

From Ethnoforms, you can perform statistical analyses from several sources, the main ones being:
- Responses to questionnaires created from the My Forms tab.
- Files imported directly into Ethnoforms in Excel or Ethnos formats.
The My Analyses tab groups together all the statistical analyses you have initiated. For each analysis, you have the following actions available:
- Archive: downloads an archive of the analysis in scz format.
- Duplicate: creates a copy of the analysis
- To modifyThis gives you access to the analysis workspace, where you will find your data, your sorts, the report, and the dashboard. It is from this workspace that you can modify all of these elements.
- DELETEpermanently removes the analysis
Using artificial intelligence
To access the artificial intelligence features, click on the pencil icon next to the relevant analysis. This will take you to a page displaying all your data — this is the Data tab, recognizable by the table icon in the top right corner.
This is the tab from which you will be able to use artificial intelligence.
1- Prepare the columns for artificial intelligence #
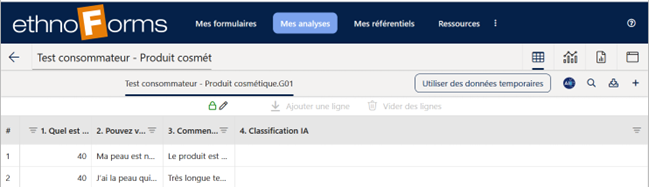
The elements generated by artificial intelligence will be integrated into new columns. At present, it is not yet possible to add a column directly from Ethnoforms, however this feature is under development.
In the meantime, here is the procedure to follow:
- Download the data file:
Click the download icon in the top right corner, then select Excel.
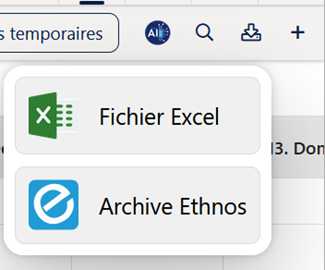
- Add the columns in Excel:
Open the downloaded file and add as many new labels as needed after your existing data on the first line. Save your changes.
- Re-import the file into Ethnoforms:
Back in Ethnoforms, click on the icon + located to the right of the download button.
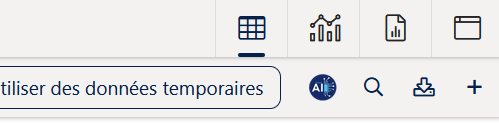
Select Excel file, choose your modified file, then click on Open.
Your new columns are now available and ready to accommodate the elements generated by artificial intelligence.
2- Use artificial intelligence #
To access the artificial intelligence features, click on the AI icon. A list of actions will then be offered.
#
3- Classify #
The first available action is Classifier (or codebook). It allows you to identify categories and themes within comments, either from a predefined dictionary that it is possible to copy/paste directly into the interface, either by letting AI generate them automatically.
3.1- Configure the classification #
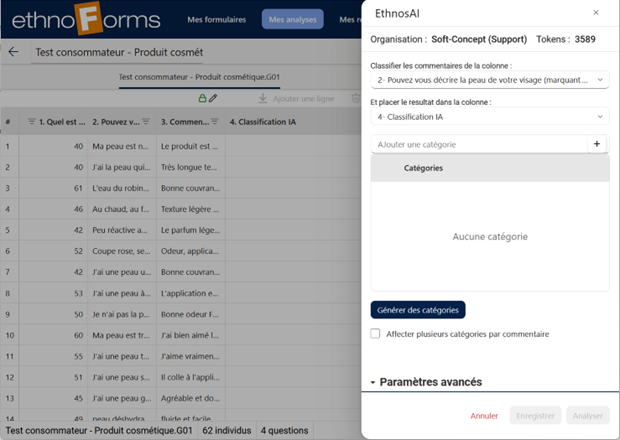
Select the column on which the AI will work, as well as the column in which the results will be placed.
You can then define your own categories or let the AI generate them automatically by clicking on "Generate categories". At any time, it is possible to modify, correct, or delete a category proposed by the AI; you can also add others to complement my suggestion.
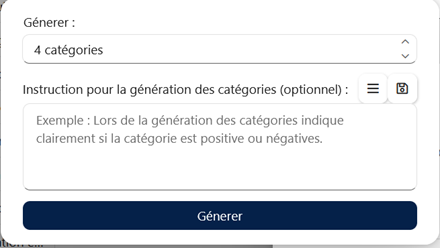
Before the launch, you will be able to:
- Define the number of categories desired.
- Add instructions to refine the generated categories, such as defining the category polarity. (positive or negative) to guide the respondents' perceptions.
A validation request will appear, indicating the number of tokens the action will use compared to the total number of tokens available.
3.2 - Assign multiple categories per comment #
A single comment can sometimes fall into several categories. By checking the box "« Assign multiple categories per comment »It is possible to associate several categories with a single comment. They will then be displayed in the same cell, separated by « / ».
4- Identify #
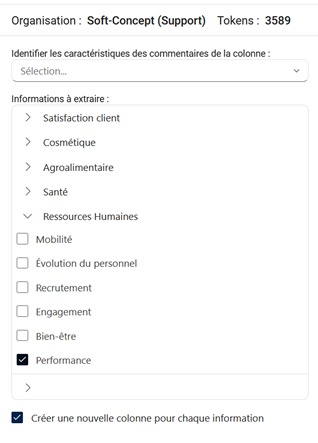
Allows you to extract a specific characteristic for a given theme. A list of default characteristics is available; you can choose from these or add a new one.
To do this, expand the empty category line — a text field will allow you to enter what you want to identify in the comments.
5- Correct #
Automatically corrects spelling mistakes in the selected comment column.
6- Summarize #
Generates an individual summary for each comment in a column. You can specify the number of sentences you want for the summary; by default, two sentences will be generated. Particularly useful when comments are long and numerous, this action allows you to quickly process a large volume of data.
7- Anonymize #
Remove the elements that could identify a respondent, replacing them with XXX. You can choose which information to delete from the following:
- Identifyname, surname
- Locationaddress, city, etc.
- Phone number
- Order number
This allows you to display the comments entered while respecting the anonymity of the respondents.
8- Translate #
Translates the content of the selected column into your chosen language. Approximately twenty languages are available:
German, English, Catalan, Danish, Spanish, Finnish, French, Greek, Hungarian, Italian, Dutch, Polish, Portuguese, Romanian, Russian, Slovak, Swedish, Czech, Ukrainian.
9- Note #
Allows you to automatically assign a rating from 1 to 5 to each comment, based on its content.
A typical use case would be comments on the quality of a service: from the text entered, an automatic rating is generated by AI.
You can define a rating criterion to guide the evaluation, but this is not mandatory. However, the column intended to receive the ratings must be of type digital.
10- Format #
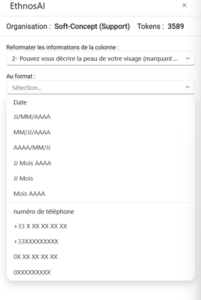
You can change the format of a date or phone number, compared to a predefined list of formats.
11- Extract #
Allows you to isolate specific information from a column. You can extract, in particular:
- The city
- The department
- The region
- The country
- The postal code
This is particularly useful when a question collects a full address and you want to automatically split it into several separate fields.
12- Personalized Prompt #
If the desired action in the selected comments column isn't available, you can choose Custom Prompt. This will allow you to describe exactly what you're looking for. The most effective approach is to use one instruction per sentence.
For example Corrects errors. Translates into English. Changes to third person. Anonymizes names.
13- Overall Analysis #
Allows you to create a general summary of a list of comments by identifying major trends. Enter a custom prompt to tailor the analysis to your needs.
For example : «Can you give me the 5 main themes addressed and the 5 main calls for action that result from them? I would like to be able to go into detail about the perception that emerges from each theme, and for the calls for action to be ranked according to their frequency of occurrence: […]»
The results are downloaded to a text document, which can then be reintegrated into the report with copy/paste.
It is also possible to relaunch a global analysis on the results extracted previously, which allows you to identify second-level themes arising from the main themes.
14- Scenario #
This section contains all the scenarios you have created and saved. Here you will find:
- Individual scenarios: for each scenario, an information icon displays a summary of its general and advanced settings.
- The scenario sequences: a sequence corresponds to the successive chaining of several scenarios.
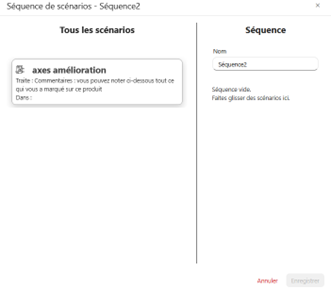
For the sequences, you can:
- Add a new sequence by clicking on the +
- Modify an existing sequence In both cases, you will be able to update the sequence label as well as the scenarios that compose it.
To save a scenario, you need to click the Save from action button.
For example, if you create a classification from the question “Do you have any training needs?” in order to sort the answers into an “AI Classification” column, the scenario will record all associated coding elements: category labels, their number, whether the classification is simple or multiple, custom prompts, and additional parameters.
Once recorded, the scenario allows the entire programmed action to be reproduced with a single click.
This allows for the chaining of multiple actions and simultaneous work on several columns using a sequence. This sequence executes several scenarios/actions successively, resulting in significant time savings.
15- Import #
This action allows you to import results files directly into your study.
For that :
- Select a file in JSON format
- Select the column in which the results will be displayed.
16- Advanced settings #
The advanced settings will be common to all actions available via AI.
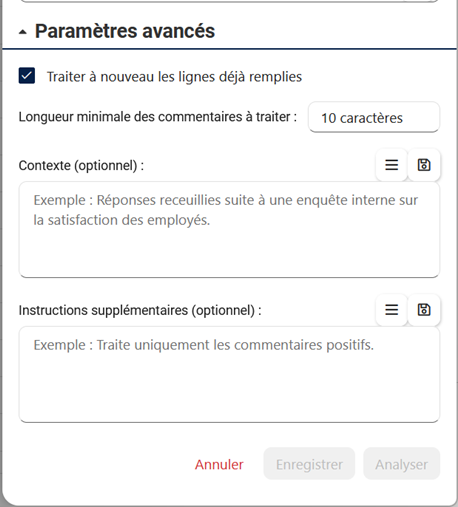
- Minimum length of comments
Define the minimum number of characters below which the AI will not process the comment.
For example, To ignore responses of type "RAS", enter 4 as the minimum length.
- Context:
Provide a clear context (survey framework, target audience) to improve the accuracy of the results.
- Contextual instructions:
Specify the elements to include or exclude to refine the AI processing.
Your instructions can be saved for later reuse using the floppy disk button.
